Grass Buddies

Have you heard of grass buddies? They were a huge hit with my kids last year so I decided to do them again this year. They are basically a Chia Pet. They are super simple to make.

Supplies:
Any size flower pot/terra cotta pot
Dirt
Grass seed
items to make a face

Here are our grass buddies from last year:


The kids loved to add the dirt and seed. I cut the face shapes out on my Cricut and the kids glued them on to the pot. Our grass buddies changed gender quite often. One day they were name a male name and had a buzz cut, a few days later they had a girl name and pig tales.

This year our grass buddies have just started growing and look like this:


I changed our pots/design this year for a few reasons. One the kids wanted the face to change as did their gender. Two when the kids would water their grass buddies water would spill and the paper face would get wet. Finally the pots were a little to large for me as they made a home on my kitchen counter. I think last years are cuter but the kids love being able to use the chalk on the pots and really it's about the kids and their creativity....right? LOL!

I had some extra terra cotta pots in the basement and gave them a coat of chalkboard paint. I watch our neighbors kids a few days out of the week,so I had 4 pots ready to go on grass buddy day! The kids first drew their face or art work on their pot. Then the kids added some dirt, then some seed, and then some more dirt. With a bit of water and some sunlight with in a few days the grass start grow and the kids get so excited! Once the grass get really tall the kids get to give their grass buddy a haircut (supervising little ones with scissors)! The great part about grass is it grows quick! Here is our grass buddies today (the picture above was from yesterday!).


Household Binder


I live by binders! I have a binder for everything! I was introduced to the system of a home management binder (I call it our household binder) about 3 years ago. I have been using this system but tweaking it from time to time to fit my needs. Recently, with us moving, I stopped using my binder. Life was crazy with the move,and we were so off schedule. Now that we are settled in our new home and life is returning to more of a schedule/routine life I knew I needed to get back on track with my household binder. 


Supplies: 
1 inch binder
forms (links below)
cardstock
pocket folder
tab inserts
computer/printer
colorful markers
label maker
My previous binders contained many forms made by me and some I found on the internet. With Pinterest there are oodles of forms out there. I found Jamie from DIY Home Sweet Home on Pinterest and she has amazing forms. I just loved the bright colors (and those of you who know me, know I love color). I used a majority of her forms and with some help from Photoshop I customized them for my family needs. 
My binder tabs are as follows: calendar, to do, menu, cleaning, thoughts, projects, kids school, my school, dates, and tabs for each family member. 


The calendar I found at Anders Ruff (love their goodies). Here is were I keep track of important events for our family. I love color so every family member has a color - I am pink, kids are orange and blue, hubby is green and I use purple for our family events. 


Next is my to do list section. I have used a daily to do list but found myself transferring tasks to the next day over and over again when I could not get to them. I have been using an on-going to do list that I just keep adding to for awhile now, and that is what works for me.

On Sunday evening I sit down and plan. This is an important step to a household binder. You have to plan! I plan our menu, write down my to do list, review my project list, update my calendar, jot down ideas and more every Sunday night.

Next tab is my menu. This is a new tab for me. In my previous post on my wall unit that organizes my paper work, I hung my menu for the week. I've been using laminated weekly menus that I made. I decided to switch and keep my menu in my household binder. The reason for this is when I would sit down to plan on Sunday I was grabbing too many things to plan. Now I just need to grab my household binder and recipe binder. Also I have only one place to go for everything I need....my household binder!


Menu tab is next. I use several different forms one is from Jamie (link above) the others are from Ginny over at Organizing Homelife. I used to just plan our dinners but my eating habits really need to change. I skip or just have a granola bar for breakfast, turkey sandwich for lunch, and a few snacks here and there. My dinners are usually healthy but the rest of my day is not. I believe my dinners are healthy because I plan them. So Jamie had a menu planner that includes breakfast, lunch and dinner. I also grabbed Ginny's forms so I can jot down our favorite recipes, recipes for entertaining, and recipes I would like to try. When I am planning I can easily browse these 3 forms and jot them into the weekly menu instead of searching through my recipe binder for that "OMG that recipe was so good I just have to make that when our friends come over this weekend!"


The cleaning tab is next! Love this form as it is broke down by daily, days of the week, monthly, quarterly and annually sections. Nicer weather is right around the corner so I hate to waste a whole day cleaning so I break my cleaning up into just a few small tasks a day. For example on Mondays I wash the darks, and dust the whole house. Tuesdays I wash the lights/whites, vacuum the first floor and clean the powder bathroom. Wednesday I wash cleaning towels, vacuum the basement and clean the basement bathroom.....and so on. By Saturday everything in the house has been cleaned. The tasks are minimal in time so I get them done in the morning and I am outside with the kids by the afternoon. This also helps the kids as they know on  Tuesday night they have to clean up all their toys because Mommy has to vacuum the next day. My kids love to build trains but they take over the floor so this helps them to breakdown their sets. My house is also for the most part company ready (I may just have to do a quick wipe down of bathrooms - I have boys!). The biggest benefit is I am happy when my house is neat and clean! What's that saying...."Happy wife, happy life." 


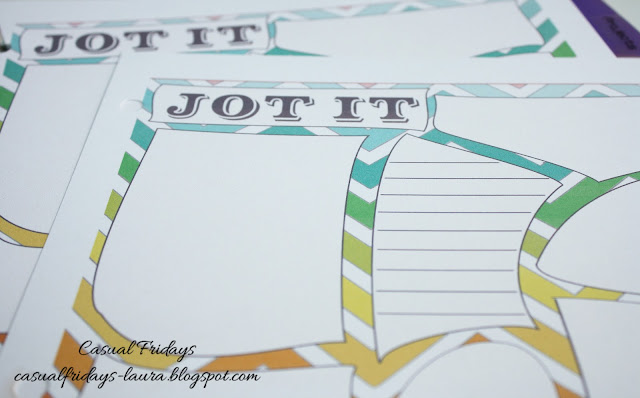
When I saw this form in Jamie's group my heart screamed. I constantly have thoughts and ideas running through my head. So many times I thought..."what was that idea I thought of, what was that website, what did I run out of?" I now have a spot to jot down these random thoughts down. I used to jot them down on a post it, notebook, dry erase board and just ended up with lots of thoughts on lots of types of paper and all were unorganized. I titled this tab in my binder "thoughts" :)


Next is my project tab. I added this form as we have just moved into a new house and there is a lot to be done. After the house to do list I have project that I am working on - organizing project, pictures of projects I want to do, information on projects, kids projects to do in the summer and more. 


After the project tab I have a school tab where I keep all the kids important school information, calendars, field trip forms, hot lunch menus, registration info,and more. Right now I keep both elementary school and preschool info in one tab as my youngest will be in the same elementary school in the
 fall so I did not want to make two separate tabs.

Then I have a tab for my school (I am currently getting my Bachelors) where I keep all my important paper work on my grades, scholarships I have applied for, loan paperwork, and any other school paperwork 
that I need to keep track of. 


Dates is the next tab. All my family and friends birthdays, and anniversaries go in here. I take a look at this at the end of every month to make sure I have cards made or on hand for the next month!


My last 4 tabs are for each family member. My tab have the above forms and I also keep anything the pertains to me only. In my husband's tab I keep his travel itinerary when he has to travel for work so I have it at my fingertips. In my kids I keep doctor info that I need from time to time, their sizes, and birthday plans for them, gift ideas and more.

I have some extra tabs in case I find I need to add a tab and I also keep a pocket folder at the back of my binder to stick paperwork in that needs to find a home in a tab when I sit down to plan on Sunday. I also printed several forms on cardstock. I am hard on this binder and I need some of my pages to stand up to the test of time. I print my calendar, to do list, cleaning list, project list, dates to remember, and my personal lists on cardstock. 

I hope you enjoyed a peek into my household binder! Head on over to the sights list above to grab their free printables. I would love to see your binders so leave me a comment with a link to yours! 

Happy Organizing!


Leprechaun Mischief - Day Three

Well that Leprechaun was back again last night and this time he is really was up to some mischief! He blocked the boys doors off with streamers and shamrocks. When the boys opened their doors this morning they were surprised. I don't know about this Leprechaun, (which the boys have named Hissy - I don't know how they come up with their names!) he is kind of a trouble maker. I think we might have to make a trap and try to catch him. I heard leprechauns are hard to catch as they are really fast! The boys and I will have to think of a trap that we can make to catch Hissy.


Leprechaun Mischief - Day Two


Our leprechaun was back last night! He left a trail of gold coins leading to our refrigerator. When I opened the refrigerator to get out some cream for my morning coffee I found GREEN milk!! That leprechaun turned our milk green!! The kids had fun drinking the green milk with breakfast!

Banner For The Bedroom

I have been loving all the banners people have posted on Pinterest, and was trying to figure out where I could put one. I decided on our bedroom.

In our old house we had a bench with bins and a matching shelf with pegs. This is were the kids backpacks, jackets and shoes all lived. I loved it!


In our new house we had this amazing built-in put in and the kids backpacks, coats and shoes have a new place to live.


I no longer need the bench and shelf but I love to re-purpose items and hated to get rid of them. The bench now sits at the foot of our bed and I am in the process of finding new bins to match our color scheme as well as a new cushion for the bench. 


I had my husband hang the shelf on the wall. I began going through my decor trying to find pieces I already had to decorate with, and then it dawned on me this would be the perfect place for a banner. I knew I would also be able to bring my pop of yellow that I wanted in the room in the banner and in the decor for the shelf.


Wa-la! Because all the spring items are in the stores right now I was able to score on the yellow flower arrangement. The plate and candle stick holders I had. On a trip to Hobby Lobby I came across the candles and knew I had to have them since they matched my bed. The grey and black bin is part of the linen collection that I won from Office Depot (still not sure what treasures I will keep in there) and I added the greenery as fillers for now. All that is missing is the paint on the wall - I'm trying to be patient about that and wait to paint after our year walk thru when they come back in to patch all the cracks and nail pops.


For the banner I created a template for the flag and traced it onto black cardstock. I added my favorite Washi tape at the top. I then bi-folded 2.5 inch strips (2 strips per flower) and hot glued them together. I punched a 2.5 flower for the yellow flower and hot glued that to the grey flower. I also punched a 2.5 flower for the back of the grey flower so it would be easier to attach to the black flag. I then used my Cricut to cut the letters and since love is only four words I decided to add a flag in the middle with a heart as I always decorate in odd numbers. I grabbed some sheer black ribbon I had on hand and strung it up. When I walk into my bedroom 
I truly "LOVE" how this project turned out!

Leprechaun Mischief - Day one

Both my kids are way into catching a leprechaun this year. They are both learning about St. Patrick's Day and are coming home from school asking if we can build a trap to catch a leprechaun. So after some google searching and a search on Pinterest I found some great ideas on the mischief that a leprechaun can do. I decided to start this tradition with the boys by the leprechaun causing mischief a week before St. Patrick's Day. I started today with this one I found at Differentiated Kindergarten. Hop on over to the blog to find out how to make the feet.


Recipe Binder!!

Do you ever feel like you are making the same meals over and over again? I was in this funk. We have our family favorites, our quick meals, and our "oops I forgot to thaw the meat" meals. I have been reading some of my favorite blogs for meals, searching online and looking on Pinterest. I have found some great meals and have been trying several out, but my recipe binder was in desperate need of a make-over. Plus all the new recipes I was printing out were being thrown into the cabinet.

I knew the first thing I wanted to do was find some cute, colorful binders. I scored these at Target and also picked up some new tabbed dividers. I of course had to add some Washi tape to the tabs.


While I was in my favorite office store, Office Depot, I found these 4x6 photo page protectors. I knew these would be perfect to slip my recipes in. Also several sites I have been printing recipes from have the option to print the recipe in a 4 x 6 format. It also has a narrow pocket great for those recipes you cut out of a magazine.


I broke out my label maker and labeled all the tabs for my categories. My first binder is all my main meals for dinner organized by the main meat in the recipe. My second binder (that I still have to finish) will be all my
 sides, salads, and desserts.

I began the project by going through my recipes, throwing out the ones that we did not oooh and ahhh over, or the ones that I never made, that sounded good at the time, but now don't sound that great anymore. I also trimmed them down. The pictures are nice to look at and can even encourage me but I felt I really didn't need them and they took up space. For my larger recipes I placed them on one sheet of scrapbook paper and slipped them into a full sheet page protector. I like using page protectors because if I splash while cooking they are easy to wipe off. 


I also added color dots to some recipes. Green dots meant the recipe was yummy, red dots meant the recipe required marination (I can't tell you how many times I went to make a recipe only to find out the meat needed to marinate for x amount of hours....grrr!) blue dots meant it was a kid favorite meal (those are hard to come by in my family) and yellow dots meant the recipe was a slow cooker or a long cook time recipe.


I also color coded my each section to help easily identify them. Plus I did not want to see the back of the recipes I cut out of magazines. I needed it to be neat and pretty! 


I put a pocket folder in the front to keep the recipes I have printed out but not tried. Once I try them if we like them I will find a home for them in the binder.


I hope you picked up some helpful tips on how to organize your recipes! I would love to see what you came up with and how you organize yours!

Happy Organizing!